You can avoid a lot of grief if you TEST before you build your boat and continue to test as you build your boat.. All production builders do it as a matter of course and it helps you catch out mistakes before they become built in and hard to reach or fix.
 Assembly Assembly
If you have never built a kayak before - practicing an assembly "dry" with no epoxy provides an opportunity to build up the physical skills and co-ordination necessary to do the job "wet" with rapidly curing epoxy in the joint.
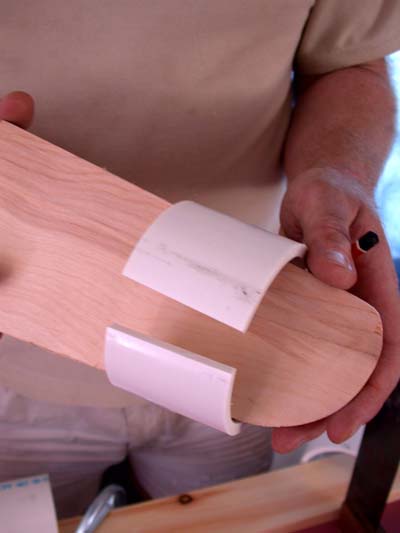
For example - in a past life I used to have all the clamps I could possibly need for a job (well nearly enough!). On these kayaks I didn't and decided to use the Schedule 4 pipe "C" clamp method. During an initial dry run on a simple job we discovered that they could be hard to open AND place around the part with sufficient control to hold the job correctly if we could not get sufficent access to hold the pipe open by muscle power alone.
We made a simple "tounge" of smoothed plywood and pushed into the clamp opening it and allowing us to place it accurately. Then we withdrew the ply and the pipe gently grasped the part without misaligning or disturbing the joint.
Epoxy -
1.
Though Roy provides East Resin with your kit (which I really liked) - The West System User Manual is a really good guide to epoxy work
2. Test that your pumps are delivering the correct volumes. Have a simple glue job ready so you don't waste your mix (possibly simply a test joint in a couple of pieces of ply). Obtain two calibrated measuring cups and make one stroke of the hardener pump into one cup. Make 1 pump of resin (which should be dispensing 5 times the volume compared to hardener) into the other cup. Check the pumps dispensed in the correct ratio. If they did not then get new, or disassemble and adjust the return springs till they get it right.
 3. While testing with epoxy learn to judge the "green" point. The resin is "green" when it has polymerized enough to no longer be a liquid and has firmed up enough to hold its mass. However it is not hard and not sharp to touch. It will be quite warm. It is like stiff rubber or a hard cheese. 3. While testing with epoxy learn to judge the "green" point. The resin is "green" when it has polymerized enough to no longer be a liquid and has firmed up enough to hold its mass. However it is not hard and not sharp to touch. It will be quite warm. It is like stiff rubber or a hard cheese.
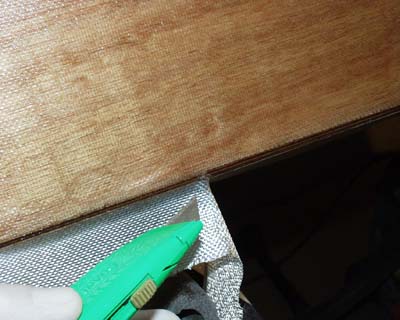
If you can judge this point you will be able to easily trim the resin (or resin saturated cloth as in the image on the right) with an extremely sharp craft knife or even chisel it which saves a lot of time compared to grinding and sanding when the resin is fully cured. You must be EXTREMELY careful not to flex the resin away from the joint or disturb the joint in any way if doing this - you will weaken the joint.
The method is best reserved for cutting resin saturated cloth or removing "spikes" or "drips" or resin.
4. Mix the resin and hardener in the correct ratio and coat either side of your test ply. While that is soaking in - thicken the remaining epoxy with some silica and wood flour. Coat one panel and then press the other panel on top. Hold with a couple of your "C" clamps.
Check the temperature at time of mix. If the temperature is 70F then the joint should be made in 12 hours and at near full strength in 24. The build manual offers the variance if the temperature is higher or lower.
 Set the mix pot outside to kick off and go hot in safety. Keep your test piece in the shop. Set the mix pot outside to kick off and go hot in safety. Keep your test piece in the shop.
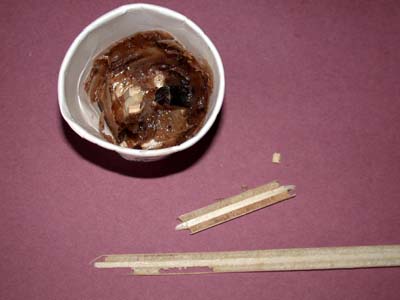
When the joint has reached it's 24 hour cure point (depending on the actual temperature during cure) inspect the mix cup and be sure it has cured (if it got too cold outside the shop then you may need to make allowance and recognize the pot needs more cure time). Try removing your mixing stick. Either the stick should break or the cup should tear. The glue should not break. The pot on the right has a problem with the wood flour which was gritty and cured in "spots". The glue failed unevenly. We replaced the wood flour and tested again. The second test was satisfactory.
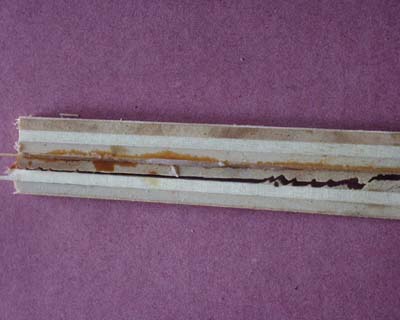 Take the "C" clamps off the ply joint and try and break the joint in your ply. Take the "C" clamps off the ply joint and try and break the joint in your ply.
It should eventually break - but NEVER on the glue line or epoxy.
A ply of timber should tear (as shown on the right) or fail.
Again - your epoxy should not fail.
When you can glue and the joint is good - then you can build your boat. BUT at every opportunity when making a joint make a test piece with the same mix and gluing pressure and test it afterwards.
It is far better to discover that a deck butt joint is no good immediately after you glued it and not a month later when you try to glue the deck on and the panel is wet with epoxy. |
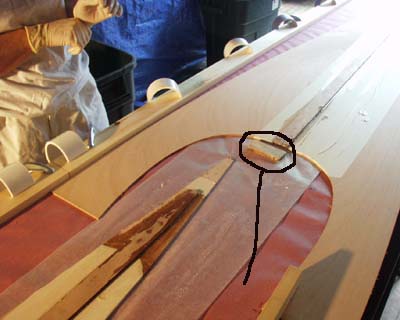 Immediately behind the cockpit curve and butt joint in this deck panel is a test piece (small rectangle) that has been glued with the same mix as used on the deck and was pressed under the same gluing pressure.
 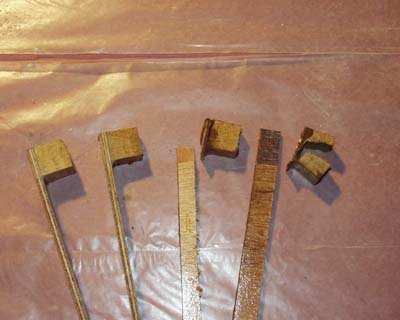 These are the offcuts left after trimming the side panels to correct length.
 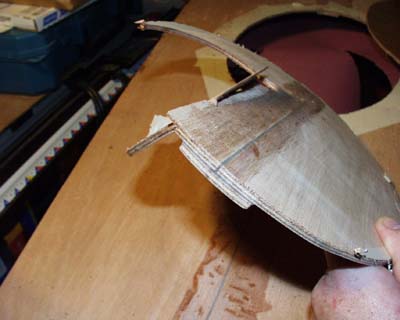 Though it is a bit late - now that the deck is glued down - we still tested the deck hatch cut out.
 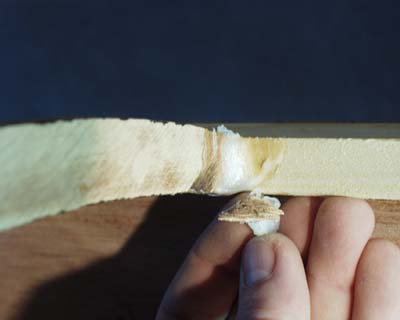 We made extensive use of silica thickened epoxy to bond items in the boats using radiused quarter round fillets. Every joint is critical but some can be "risked" because they can be easily accessed and repaired.